 Dark Ages Re-Creation Company


Creator: Karen Peterson, with help from her husband, Neil
Materials: warp weighted loom, loom weights are clay
Artefacts used: No extant samples of warp-weighted looms have been found
in the Viking Era, although loom weights and textiles fragments have been identified.
Other Links: http://www.cs.vassar.edu/~capriest/wwloom.html
Introduction:
Fabric types recovered from the Viking Era fall into two basic weave types - tabby and twill, each with several variations. My first project was the simpler of the two, a tabby weave. For this second project, I decided to try a 2/2 twill, perhaps the most common of the twills.
Still not having enough hand-spun wool to weave with, I again choose a commercial yarn to work with. In my first project, I bought 10 balls each of blue and white Patons' Classic Wool Merino. I used the white for the warp and the blue for the weft. I ended up using only 1.5 balls of the blue in the weft so I decided to re-use it in this project.
I made the warp wider, but shorter then my first project.
Testing to Achieve the Pattern:
I knew what a 2/2 twill pattern was supposed to look like, but I couldn't figure out the relationship of the heddles to the sheds needed, how many rods, etc. I first set up a tiny project on a small loom to figure it out, and played with heddles and sheds until I started seeing the pattern that I was aiming to achieve.
Warping Up:
I cut the warp to 18 feet, looping it over a small dowel rod so that there were 9 feet on each side. I expect this will yield a 6 foot length of fabric. Once it was fully warped, I sewed the dowel onto the header rod on the loom.
Sizing:
In my first project, I found that the warp threads 'shed' fuzziness, particularly at the heddles, and that the shed was often sticky and difficult to open. Input from various mailing lists suggested the process of sizing - coating the warp in a liquid made by boiling flax seeds until the water becomes the consistency of a sticky soup. In retrospect, I should have kept the flax seeds in a permeable bag of some sort, as the flax seeds themselves also stuck to the warp and had to be brushed off when dry.
I first started weaving this project while we were in Rhode Island for a demo and I could not notice any significant difference the sizing might have made to the stickiness of the warp. It was stunningly hot and humid that weekend and that may have countered any effect that sizing had on the warp.
When I later took the project to a demo at the Cranbrook Institute of Science in Detroit, the stickiness was much improved. I hope this is the effect of the sizing.
Heddles:
I used 3 heddle rods to create 4 sheds. The 4th shed is created by the bottom beam of the loom when all 3 heddle rods are at rest against the loom.
I used colour coding (not likely a period method) to differentiate between the heddle rods so I could remember the order that each needed to be pulled out in order to maintain the 2/2 twill pattern. We don't have enough information to determine how the Norse would have ordered their weaving to achieve a consistent pattern, but we do have fabric samples to attest to a consistent patterning.
Heddle rod #1: I used brown embroidery floss to sew the heddles to the rod. Each heddle on rod #1 captured threads #1 and 2 in the pattern.
Heddle rod #2: I used green embroidery floss to sew the heddles to the rod. Each heddle on rod #2 captured threads #2 and 3 in the pattern.
Heddle rod #3: I used beige embroidery floss to sew the heddles to the rod. Each heddle on rod #3 captured threads #3 and 4 in the pattern.
Sewing the heddles onto the rod took 4 hours for each rod! This was a painful experience, especially as I was rushing (!!) to get this done before we had to pack up for the trip to Rhode Island.
Bundling the Warp Threads:
I separated the warp threads on either side of the bottom beam such that threads #1 and 4 hung in the front and threads #2 and #3 hung in the back. Then I added the weights, tieing 20 warp threads to each weight. Each front weight is tied to 10 #1 and 10 #4 warp threads, while each back weight is tied to 10 #2 and 10 #3 warp threads.
This manner of tieing the weights to the warp threads is part of the problem that I'm discovering with opening sheds #1 and 3. For example, since each front weight pulls #1 & #4 warp threads - the #1 and #3 sheds, where one of those warp threads is supposed to drop back, and the other is pulled forward, they resist because they are both tied to the same weight.
How to Create the Pattern / Starting the Weave:
When rod #1 is pulled forward on the heddle rod supports, it pulls forward threads #1 and 2 and threads #3 and 4 drop back, creating one shed and this pattern:
ooxxooxxooxxooxx
When rod #2 is pulled forward on the heddle rod supports, it pulls forward threads #2 and 3 and threads #1 and 4 drop back, creating one shed and this pattern:
oxxooxxooxxooxxo
When rod #3 is pulled forward on the heddle rod supports, it pulls forward threads #3 and 4 and threads #1 and 2 drop back, creating another shed and this pattern:
xxooxxooxxooxxoo
When all three rods are at rest against the loom, the bottom beam functions as the only separator such that threads #1 and 4 are forward and threads #2 and 3 are in the rear. This creates this pattern:
xooxxooxxooxxoox
This is what the whole pattern looks like overall:
ooxxooxxooxxooxx
oxxooxxooxxooxxo
xxooxxooxxooxxoo
xooxxooxxooxxoox
Weaving, still in process:
In one weekend at Rhode Island, I managed to weave 4.5 inches of fabric. Being in demo mode, I was in bright bright sunlight without my glasses and peering at my project from about 3 inches away. I really need to get contact lenses.
We packed it up and the next time I got back to the project was another demo a few months later at the Cranbrook Institute of Science. I found there was a line across the fabric where I had left off. My guess is that when I started again, I picked up with the wrong rod, breaking the consistency of the pattern. At Cranbrook, I wove another 6.5 inches of fabric, again without my glasses or contacts. I have to wonder if a Norse woman with sight problems would have been one of the weavers.
When I came home from the Cranbrook demo, I immediately wove another inch of fabric to make sure that such a line in the fabric didn't re-occur.
We went to Rhode Island again in September 2004, but this time, I had contact lenses! I could actually see what I was doing.
I've woven a bit off and on at home, but it largely gathers dust. I find the sheds sticky and difficult to open.
Update/Conclusion:
Well, it's July 2006 and I'm tired of this damned project. It's been on the loom for over 2 years. I've come to the conclusion that I need to step away from a project that just wasn't working. The sheds were constantly sticky and difficult to open.
I'd like to think that I'm not a bad weaver, just inexperienced. So maybe I'm not ready for a 2/2 twill. I'm self-taught, and I have no other warp-weighted loom weavers nearby to consult with.
There's something about the way I choose to tie the weights that made the sheds more difficult, but nothing else remotely made sense to me or made any difference to the results.
So... I bit the bullet, gave up, took it off the loom and turned it into a bag. We need more period looking bags to tote things with.
Picture of the finished product is forthcoming.
The good news is that I've started a third project!
 |
 |
||
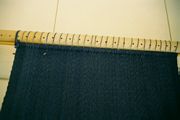
| The weave | The weights |
Bibliography:
Warp-Weighted Loom: studies in the history and technology of an ancient implement, Marta Hoffman. Robin and Russ Handweavers. first printed in 1964 as no.14 in the series Studia Norgevica.
North European Textiles until AD 1000, Lise Bender Jorgensen. Aarhus UP 1992. ISBN 8772884169