Iron Production Experiment - Sep 2005
Date: 1 Sep, 2005
Location: Annapolis Royal, NS
Premise: All proper equipment, done in costume. The presentation at CANIRON 2005.
Experiment Notes - Norse Short Shaft Smelter
The Team:
| Leader |
Darrell Markewitz |
| Staff |
Kevin Jarbeau
Dave Cox
Mark Pilgrim |
| Recorder |
Neil & Karen Peterson |
 |
Reports of all of our iron smelting efforts along with more articles and information are available on the "Iron Smelting in the Viking Age" CD from the Wareham Forge. Copies of the CD can be purchased here. |
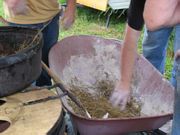
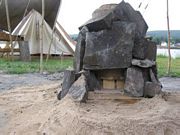
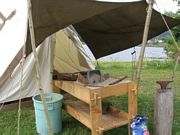
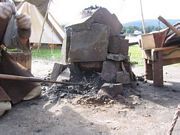
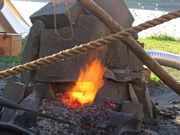
Setting up the smelter:
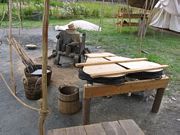
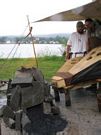
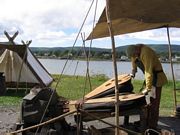
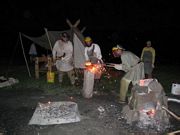
The majority of the stage dressing was done the day before the smelt (Aug 31). The presentation included a norse tent as a background, a "sand table" forge, displays of tools, a table with displays of previous results and handouts, and the actual smelter and tools required for the planned smelt.
 |
 |
 |
 |
| Mixing cob |
Patching flaws |
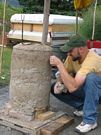
Rocks around outside |
Reverse view |
 |
 |
 |
 |
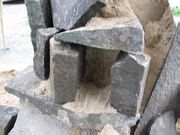
| Location of tap arch |
Tuyere location |
Smelter from above |
Discussion of plans |
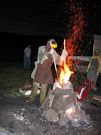
The day of the smelt dawns anything but bright and sunny... Rumour was that this was pushed in by Hurricane Katrina. The good news was that it cleared out by lunch and the day turned out lovely, although some sunburns did occur.
 |
 |
 |
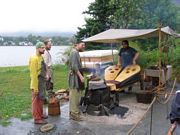 |
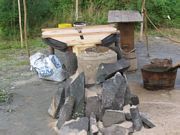
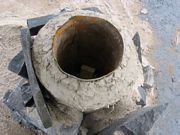
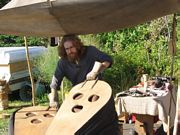
| Sand table forge |
Removing inner form |
Hole for tuyere |
Mark on the bellows |
 |
 |
 |
 |
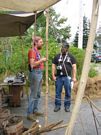
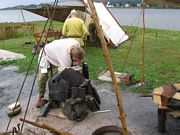
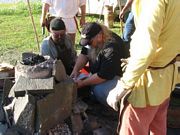
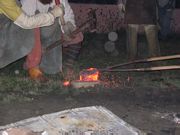
| Darrell receiving advice |
Kevin on bellows |
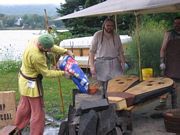
Adding charcoal |
Darrell lectures |
 |
 |
 |
 |
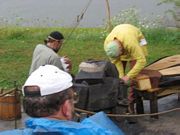
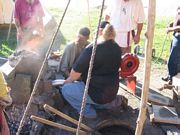
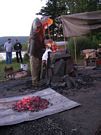
| Spreading ore |
Exhausting work |
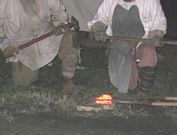
Checking tap arch |
Jake on bellows |
 |
 |
 |
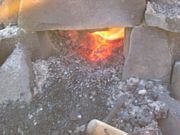 |
| Connecting air |
Checking airflow |
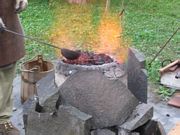
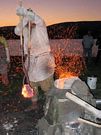
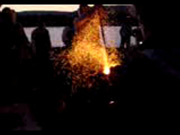
Flame from tap arch |
Slag running |
 |
 |
 |
 |
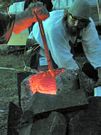
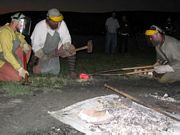
| Scooping charcoal |
Chipping bloom free |
Dave removes bloom |
Reducing bloom |
 |
 |
 |
 |
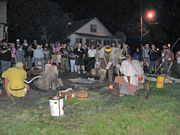
| Compacting |
Crowd watching |
Pulling again |
Consoldation |
 |
 |
| |
| Consolodation |
Final result |
There is also a movie of the extraction
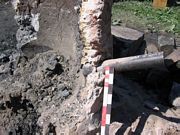
 The morning after
As usual we deconstructed the site the morning after the smelt taking a variety of measurements to assist in our experiments.
 |
 |
 |
 |
| Tuyere |
Tuyere |
Tuyere |
Slag adhesions |
 |
 |
 |
 |
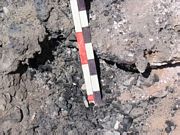
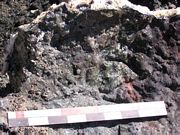
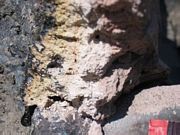
| Wall colour |
Wall changes |
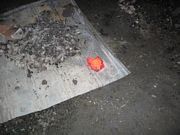
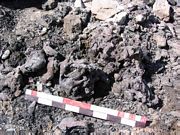
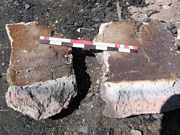
Grades of product |
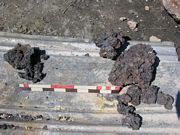
Bit of bloom |
| Time |
Event |
Measures |
| Relative |
Absolute |
Total |
| Relative |
Elapsed |
Charcoal |
Ore |
Sand |
| 0:00 |
00 |
addition rough charcoal, occasional gentle air blast (begins at 1120h) |
|
|
|
|
|
| 0:32 |
32 |
first graded charcoal added |
|
|
|
|
|
| 0:45 |
13 |
charcoal |
1 |
4 lbs* |
4 lbs |
|
|
| 1:02 |
17 |
charcoal |
2 |
4 lbs |
8 lbs |
|
|
| 1:22 |
20 |
charcoal |
3 |
4 lbs |
12 lbs |
|
|
| 1:40 |
18 |
charcoal |
4 |
4 lbs |
16 lbs |
|
|
| 1:42 |
|
seed charge |
1 |
.75 lbs* |
|
.75 lbs |
|
| 1:58 |
18 |
charcoal |
5 |
4 lbs |
20 lbs |
|
|
| 2:00 |
18 |
seed charge |
2 |
.75 lbs |
|
1.5 lbs |
|
| 2:19 |
21 |
charcoal |
6 |
4 lbs |
24 lbs |
|
|
| 2:21 |
21 |
seed charge |
3 |
.75 lbs |
|
2.25 lbs |
|
| 2:46 |
27 |
charcoal |
7 |
4 lbs |
28 lbs |
|
|
| 2:47 |
26 |
seed charge |
4 |
.75 lbs |
|
3 lbs |
|
| 3:06 |
20 |
charcoal |
8 |
4 lbs |
32 lbs |
|
|
| 3:09 |
22 |
seed charge |
5 |
.75 lbs |
|
3.75 lbs |
|
| 3:32 |
26 |
charcoal |
8 |
4 lbs |
36 lbs |
|
|
| 3:32 |
23 |
seed charge |
6 |
.75 lbs |
|
4.5 lbs |
|
| 3:49 |
|
sand |
1 |
1 scoop |
|
|
1 scoop |
| 3:58 |
9 |
sand |
2 |
1 scoop |
|
|
2 scoops |
| 3:58 |
26 |
charcoal |
9 |
4 lbs |
40 lbs |
|
|
| 3:59 |
27 |
seed charge |
7 |
.75 lbs |
|
5.25 lbs |
|
| 4:16 |
18 |
charcoal |
10 |
4 lbs |
44 lbs |
|
|
| 4:17 |
19 |
sand |
3 |
1 scoop |
|
|
3 scoops |
| 4:17 |
18 |
seed charge |
8 |
.75 lbs |
|
6 lbs |
|
| 4:40 |
24 |
charcoal |
11 |
4 lbs |
48 lbs |
|
|
| 4:43 |
26 |
sand |
4 |
1 scoop |
|
|
4 scoops |
| 4:43 |
26 |
seed charge |
9 |
.75 lbs |
|
6.75 lbs |
|
| 5:07 |
27 |
charcoal |
12 |
4 lbs |
52 lbs |
|
|
| 5:07 |
24 |
sand |
5 |
1 scoop |
|
|
5 scoops |
| 5:08 |
25 |
seed charge |
10 |
.75 lbs |
|
7.5 lbs |
|
| 5:51 |
44 |
charcoal |
13 |
4 lbs |
56 lbs |
|
|
| 5:55 |
48 |
sand |
6 |
1 scoop |
|
|
6 scoops |
| 5:56 |
48 |
seed charge |
11 |
.75 lbs |
|
8.25 lbs |
|
| 6:42 |
|
Changed to Electric Blower |
|
|
|
|
|
| 6:46 |
55 |
charcoal |
14 |
4 lbs |
60 lbs |
|
|
| 6:46 |
51 |
sand |
7 |
1 scoop |
|
|
7 scoops |
| 6:47 |
51 |
seed charge |
12 |
.75 lbs |
|
9 lbs |
|
| 6:54 |
8 |
charcoal |
15 |
4 lbs |
64 lbs |
|
|
| 6:55 |
8 |
seed charge |
13 |
.75 lbs |
|
9.75 lbs |
|
| 6:56 |
10 |
sand |
8 |
1 scoop |
|
|
8 scoops |
| 7:03 |
9 |
charcoal |
16 |
4 lbs |
68 lbs |
|
|
| 7:11 |
8 |
charcoal |
17 |
4 lbs |
72 lbs |
|
|
| 16 |
ore charge |
14 |
1.5 lbs |
|
11.25 lbs |
|
| 7:20 |
9 |
charcoal |
18 |
4 lbs |
76 lbs |
|
|
| ore charge |
15 |
2.25 lbs |
|
13.5 lbs |
|
| 19 |
sand |
9 |
1 scoop |
|
|
9 scoops |
| 7:30 |
10 |
charcoal |
19 |
4 lbs |
80 lbs |
|
|
| ore charge |
16 |
3 lbs |
|
16.5 lbs |
|
| sand |
10 |
1 scoop |
|
|
10 scoops |
| 7:42 |
12 |
charcoal |
20 |
4 lbs |
84 lbs |
|
|
| ore charge |
17 |
3 lbs |
|
19.5 lbs |
|
| 7:52 |
10 |
charcoal |
21 |
4 lbs |
88 lbs |
|
|
| ore charge |
18 |
3 lbs |
|
22.5 lbs |
|
| 8:01 |
9 |
charcoal |
22 |
4 lbs |
92 lbs |
|
|
| ore charge |
19 |
.75 lb |
|
23.25 lbs |
|
| 8:03 |
|
reduce air flow |
|
|
|
|
|
| 8:10 |
9 |
charcoal |
23 |
4 lbs |
96 lbs |
|
|
| 8:22 |
27 |
reduction charge |
20 |
.75 lbs |
|
24 lbs |
|
| 8:22 |
12 |
charcoal |
24 |
|
100 lbs |
|
|
| 8:35 |
13 |
charcoal |
25 |
|
104 lbs |
|
|
| 8:42 |
|
reduce air flow |
|
|
|
|
|
| 8:45 |
|
reduce air flow further |
|
|
|
|
|
| 8:47 |
|
air flow reduced to minimal - remaining charcoal removed |
|
|
|
|
|
| 8:52 |
|
consolidate bloom with wooden thumper |
|
|
|
|
|
| 9:02 |
|
remove bloom and consolidate |
|
|
|
|
|
| 9:06 |
|
return bloom to smelter |
|
|
|
|
|
| 9:11 |
|
remove bloom and consolidate |
|
|
|
|
|
| |
|
return bloom to smelter |
|
|
|
|
|
| |
|
remove bloom and consolidate |
|
|
|
|
|
| |
|
return bloom to smelter |
|
|
|
|
|
| |
|
remove bloom and consolidate |
|
|
|
|
|
| |
|
return bloom to smelter |
|
|
|
|
|
| |
|
remove bloom and consolidate |
|
|
|
|
|
NOTES:
Charge times recorded at END of unit addition
* All charcoal charges are based on a 'standard pail' - weight of 4 lbs
All ore charges are based on a 'standard scoop' - weight of 3/4 lbs
All sand charges are based on a 'standard scoop' - weight of ??? lbs
Estimated from known marks
YIELD: 5 lbs (estimated)
Our presentation at
CANIRON was a partial success.
As a smelting history demonstration, it was excellent - and very well
received. The fact that equipment problems and substitutions put us
into early evening for the bloom extraction made the showering sparks
extremely impressive.
Dr Brigitta Wallace was an observer for most of the day long smelt -
plus for the forging contest the next day. As with other archaeologists
who have seen us at work, she felt she had a much better understanding
now of how the physical remains relate to actual process.
What happened:
Slag
We used the pure taconite ore, which has almost no silica in it
We researched and used a commercial high temperature clay for the smelter walls, no melting means no silica.
No silica and no silica means NO SLAG. No slag means no carbon control.
We thus (predictably) produced a block of CAST iron.
Although an attempt to create more slag via addition of beach sand -
this was done on the spur of the moment and without real science. With
some thought we should have been able to run the numbers on this.
By the way - the finished bloom mass was
stolen late
the night of the smelt. We have one tennis ball sized fragment. With
image evidence we should be able to guess the total weight from the
fragment - but really do not have any yield measurements.
Air
The large bellows continues to create problems. Modifications to the
bag and plate construction, new handle shape, new frame - all made these physically easier to use.
There remains a problem with air delivery. Right now there is no
downstream valve set up. We think what happened is that as
soon as slag / sintered ore started to obstruct the tuyere, we actually
were pushing air from one chamber into the other as much as pushing air
to the smelter. Simple flap valves should help with this. With use of a mechanical air system - the reaction kick started almost
immediately.
Lesson Learned: we should make sure we have a mechanical system on
hand regardless. A hand cranked blower at least.
Kevin points out (via his reading of Pliener):
Historic iron production sites often show three or four types of
smelter construction - one each. Then there will be dozens (or
hundreds) of one of these styles. Likely explanation is that they tried
a couple of different set ups to utilize local materials. Once
something worked - they duplicated that over and over.
Ore / clay / smelter shape / charcoal /air system
all fit together to produce a 'best possible' combination.
Our major problem is that we keep changing multiple variables almost
every time. If you look at the smelts with good results - you see they
are times when only one (or two) variables are changed.
|
Reports of all of our iron smelting efforts along with more articles and information are available on the "Iron Smelting in the Viking Age" CD from the Wareham Forge. Copies of the CD can be purchased here. |
 Dark Ages Re-Creation Company